How to Drastically Improve Your Mini Projector's Image Quality (Budget-Friendly Tips)

So, you've got yourself a mini projector—maybe a budget-friendly model like the TMY Mini Projector, or perhaps you've invested in something more premium like the Anker Nebula Capsule II. But when you fired it up for the first time, the image wasn't quite the crisp, vibrant, cinema-quality experience you were hoping for.
Don't worry—you're not alone! The truth is, even the most expensive projectors need proper setup and environment to shine (pun intended). And with mini projectors, which typically have lower brightness and resolution than their full-sized counterparts, optimizing your setup becomes even more crucial.
The good news? You can dramatically improve your projector's image quality without spending a fortune. I've spent years tinkering with various projectors in all kinds of spaces, from cramped dorm rooms to outdoor camping setups, and I'm going to share the practical tricks I've learned to make even modest projectors look surprisingly good.

The Darkness Dilemma: Your #1 Image Quality Enemy
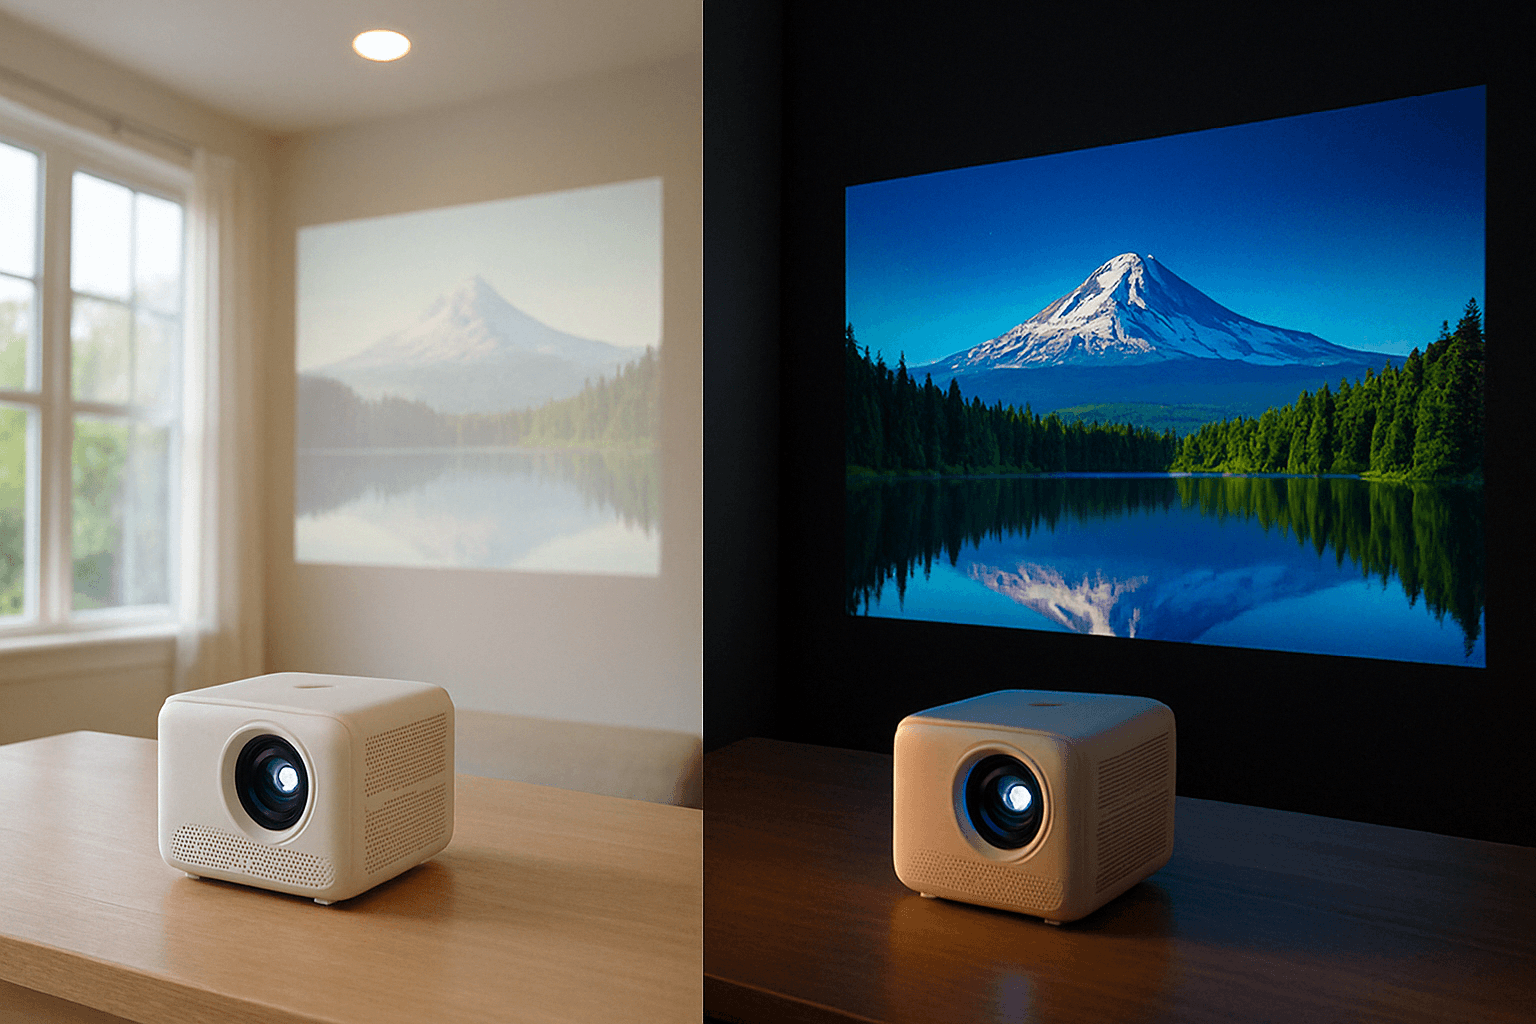
Let's start with the single biggest factor affecting your projector's image quality: ambient light. If you've been disappointed with a washed-out, barely visible image, chances are it's not (just) your projector's fault—it's the lighting in your room.
Mini projectors typically output between 100-500 ANSI lumens of brightness (like the GAIMOO GM200's 350 lumens). For perspective, sunlight is about 100,000 lux, and even a modestly lit living room is around 300 lux. Your little projector is literally fighting against these light sources to create a visible image.
Practical Darkness Solutions
For Night Viewing:
- Blackout curtains are your best friends—they're affordable and make a massive difference
- Cover reflective surfaces (mirrors, glass picture frames) that might bounce light toward your screen
- Use bias lighting (soft light behind your screen) to reduce eye strain without washing out the image
- Turn off or dim display lights from other devices in the room
For Daytime Viewing:
- Create a "projection nook" in the darkest corner of your room
- Use a dark gray or black screen material that absorbs ambient light (more on screens later)
- Consider front projection only (rear projection looks terrible in ambient light)
- Accept limitations—mini projectors simply aren't built for bright rooms (save critical viewing for evening)
If you're specifically looking for maximum brightness in a mini projector, check out our 2025 home entertainment projector roundup, which highlights brighter options.
The Screen Situation: What You Project Onto MATTERS
I get it—one of the cool things about projectors is that you can project onto pretty much any surface. But just because you can doesn't mean you should. A dedicated projection surface can dramatically improve image quality, even with budget projectors.
Screen Options: From Budget to Better
Proper Projection Screens
If your budget allows, a proper projection screen (ranging from $25-$200+ for mini projector use) provides the best image quality. For a detailed comparison, see our projector screen reviews.
Budget DIY Screen Materials (Tested & Ranked)
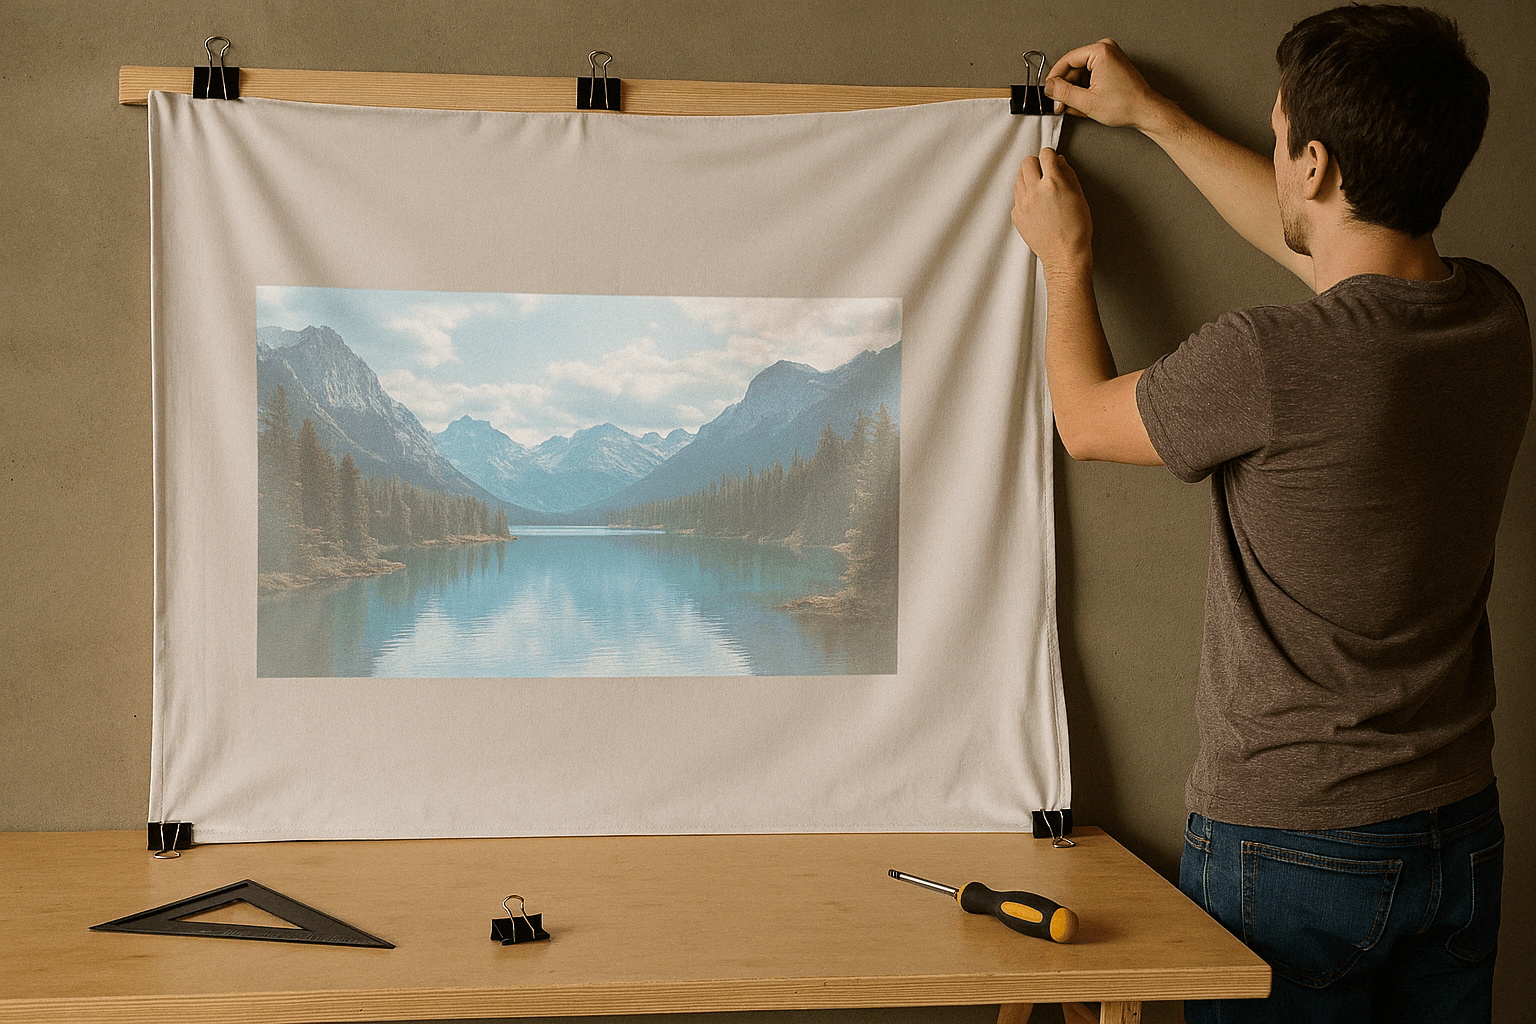
- White blackout cloth (fabric stores, ~$10/yard) - 90% as good as a proper screen
- Smooth white shower curtain liner (~$5-10) - Surprisingly effective when pulled taut
- White foam board panels taped together (~$15 for a decent size)
- Flat white painted wall (use matte, not glossy paint) - Basic but serviceable
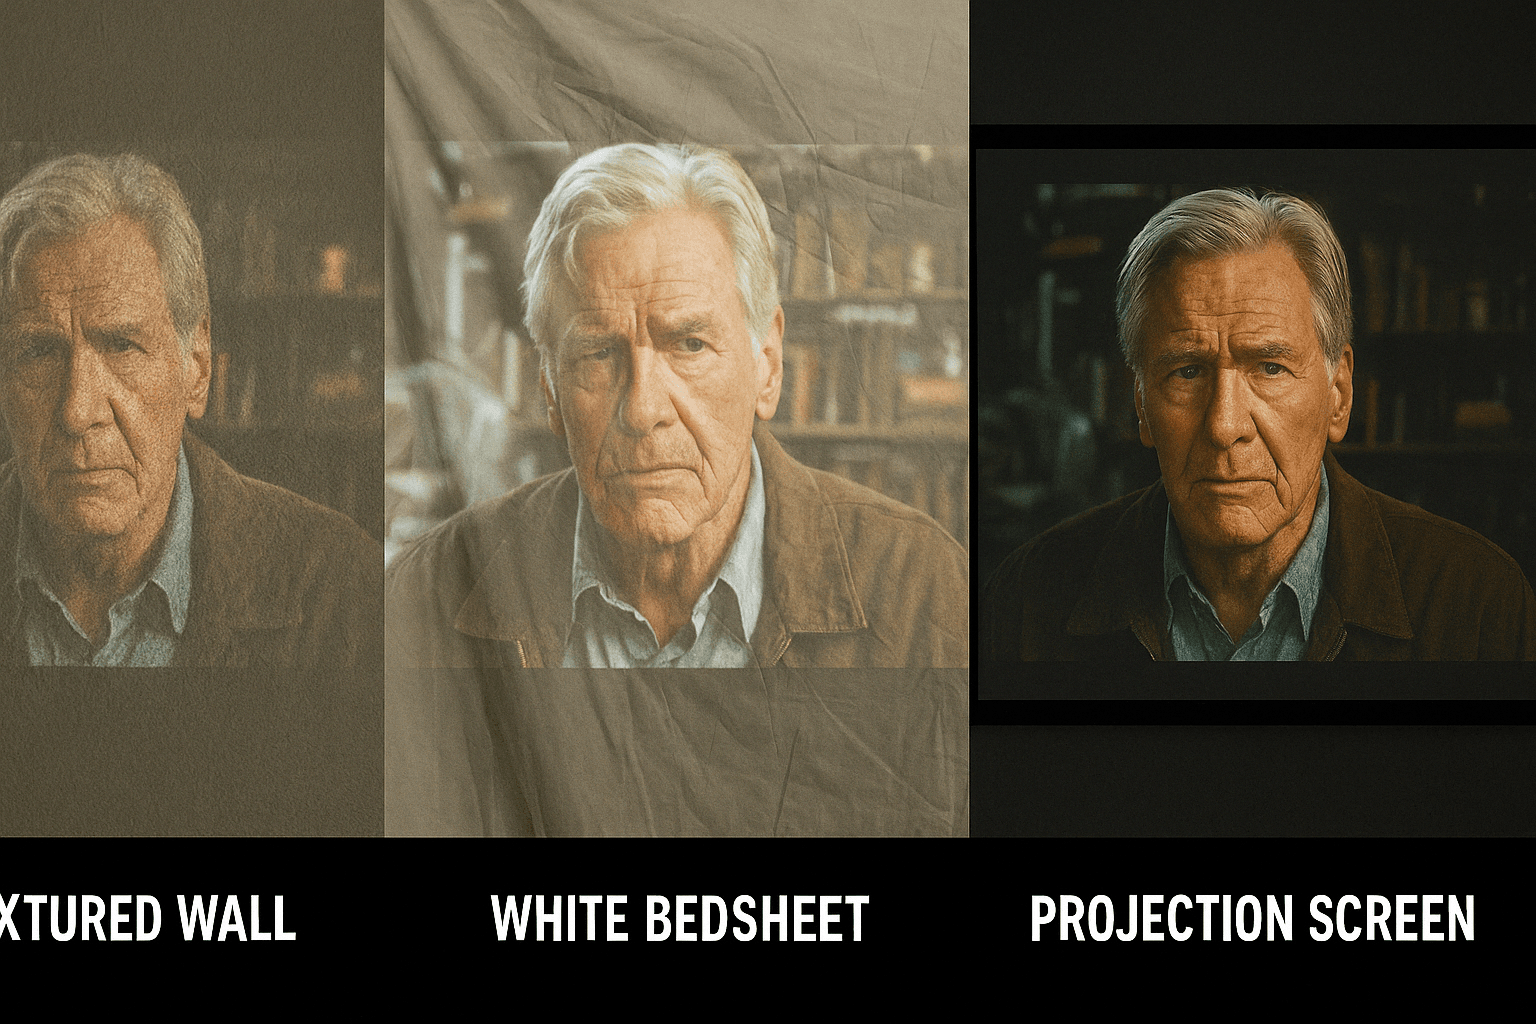
- White bedsheet - Only if ironed and pulled extremely tight (wrinkles ruin the image)
Screen Surface Tips
- Whatever surface you use must be completely flat - even small wrinkles will be visible and distracting
- Texture ruins detail - textured walls dramatically reduce apparent resolution
- Clean your surface - dust, smudges, and imperfections become very noticeable when projected upon
DIY Screen Mounting Trick
Need a temporary but effective screen setup? Grab some strong rare-earth magnets and binder clips. Attach the blackout cloth to the binder clips, then use the magnets on the other side of a drop ceiling panel or metal door frame to hold it taut. You can also create a PVC frame for under $20 using pipes and connectors from a hardware store.
Positioning Perfection: Distance, Angle, & Focus
Poor placement and setup can degrade your image quality dramatically. Let's fix that with some practical positioning advice:
Finding Your Projector's Sweet Spot
The "Throw Distance" Challenge
Every projector has an optimal distance range from the screen (called "throw ratio"). Too close or too far and the image quality suffers.
- Check your projector's manual for its specific throw ratio
- As a general rule, mini projectors work best at distances between 5-12 feet
- Closer typically means a brighter, more vibrant image
- Use a proper projector stand for easy positioning
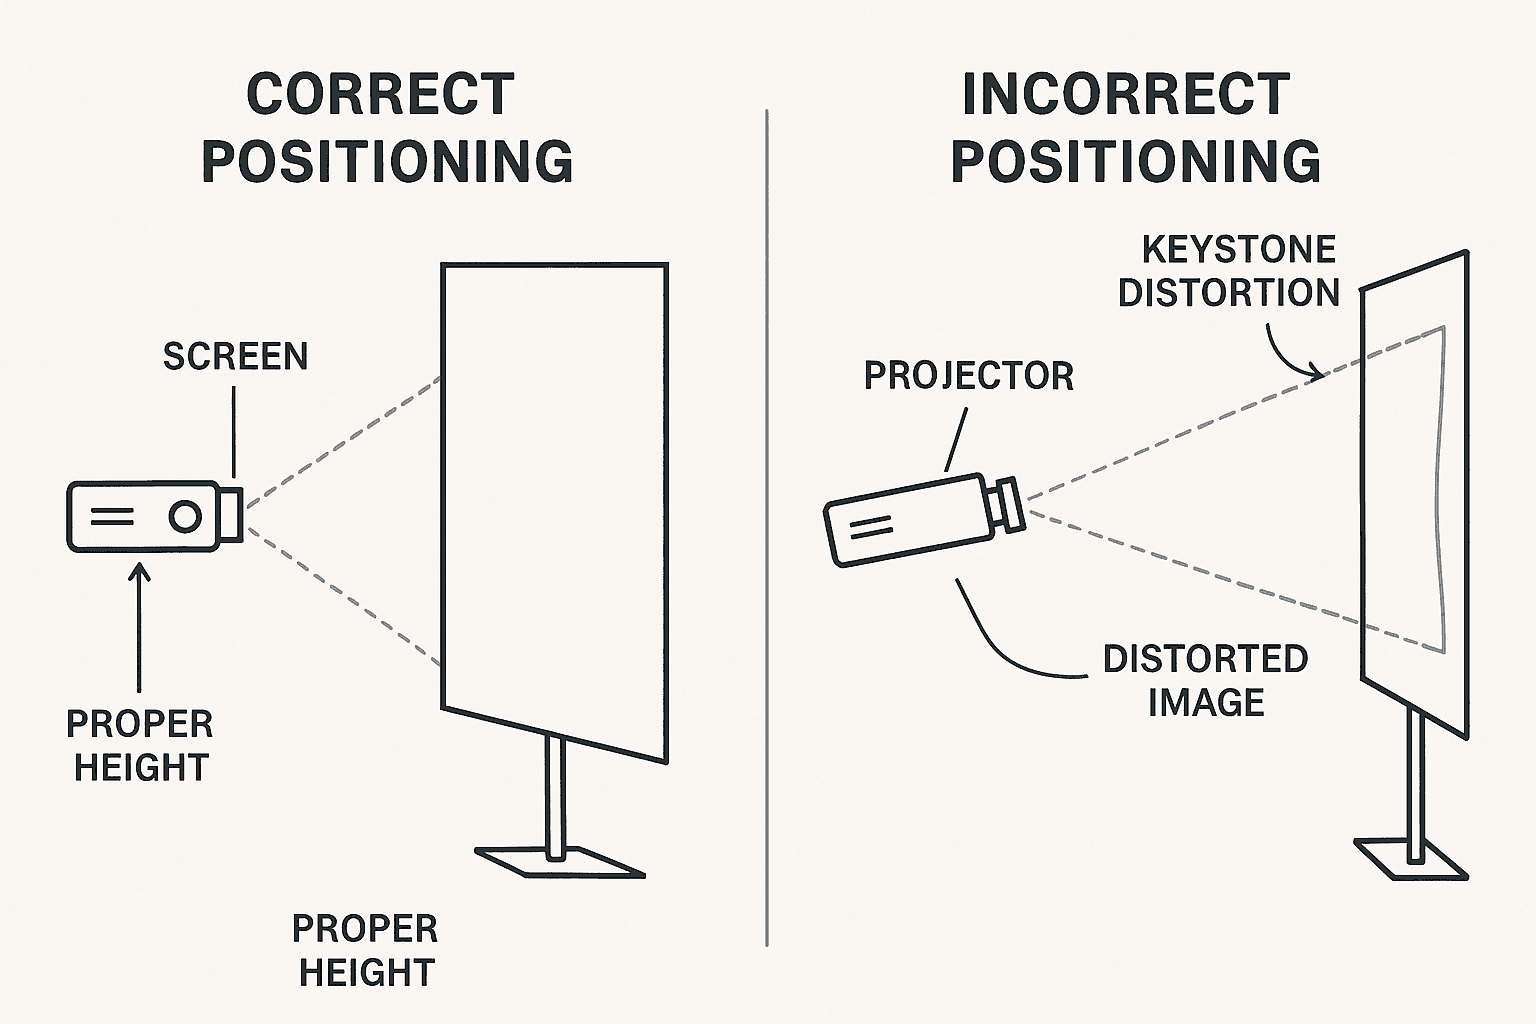
Angle & Alignment Fixes
Ideally, your projector should be directly perpendicular to the center of your screen. Any angle creates distortion called "keystone effect."
- Use your projector's keystone correction as a last resort (it reduces image quality)
- Better option: physically align your projector perpendicular to the screen
- Best height: align projector with the middle of your screen
- Use books, adjustable shelving, or a projector mount to achieve proper height
Focus Mastery for Crystal Clear Images
Nothing ruins detail like a slightly out-of-focus image. Many mini projectors have manual focus dials that require patience to perfect. Here's my foolproof focus method:
- Project something with small text (like a web browser)
- Stand near the screen (not near the projector)
- Adjust focus slowly until text appears sharpest
- Move back to your viewing position to confirm
- For projectors with automatic focus (like the Anker Nebula Capsule II), trigger it in similar lighting conditions to your actual viewing
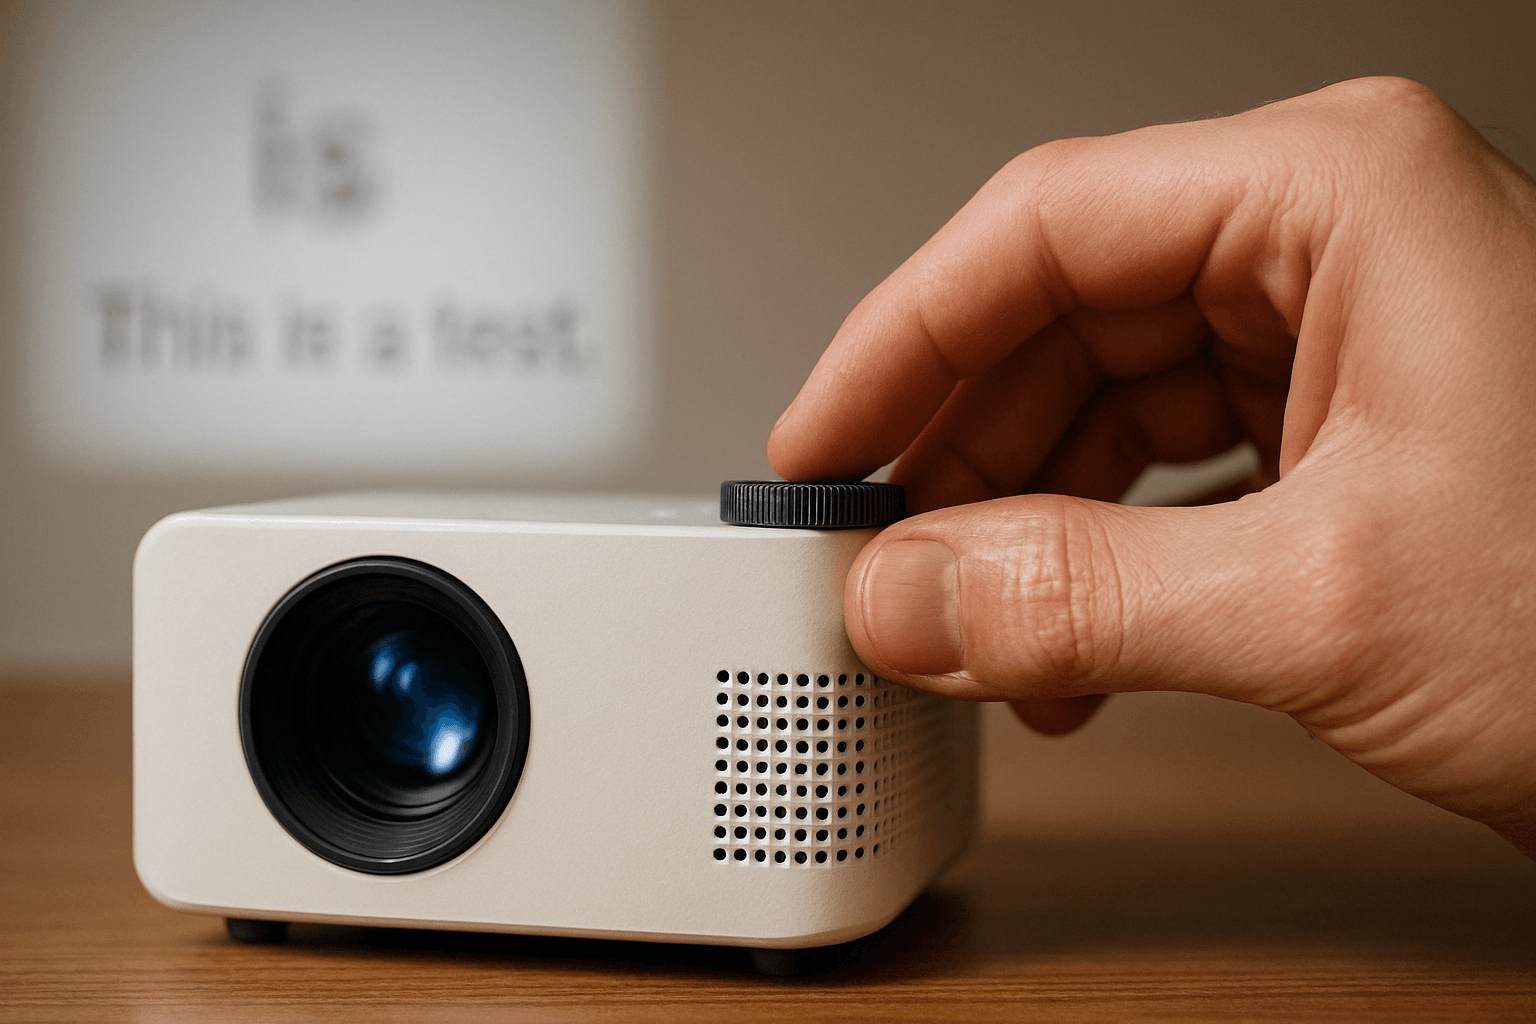
Pro tip: Once you've found the perfect focus, some users place a small mark on the focus dial to easily find that position again for their regular setup.
Settings Wizardry: Optimizing Your Projector's Built-in Options
Your projector likely has several image settings that can dramatically improve (or ruin) picture quality. Here's how to navigate them wisely:
The Perfect Settings Cheat Sheet
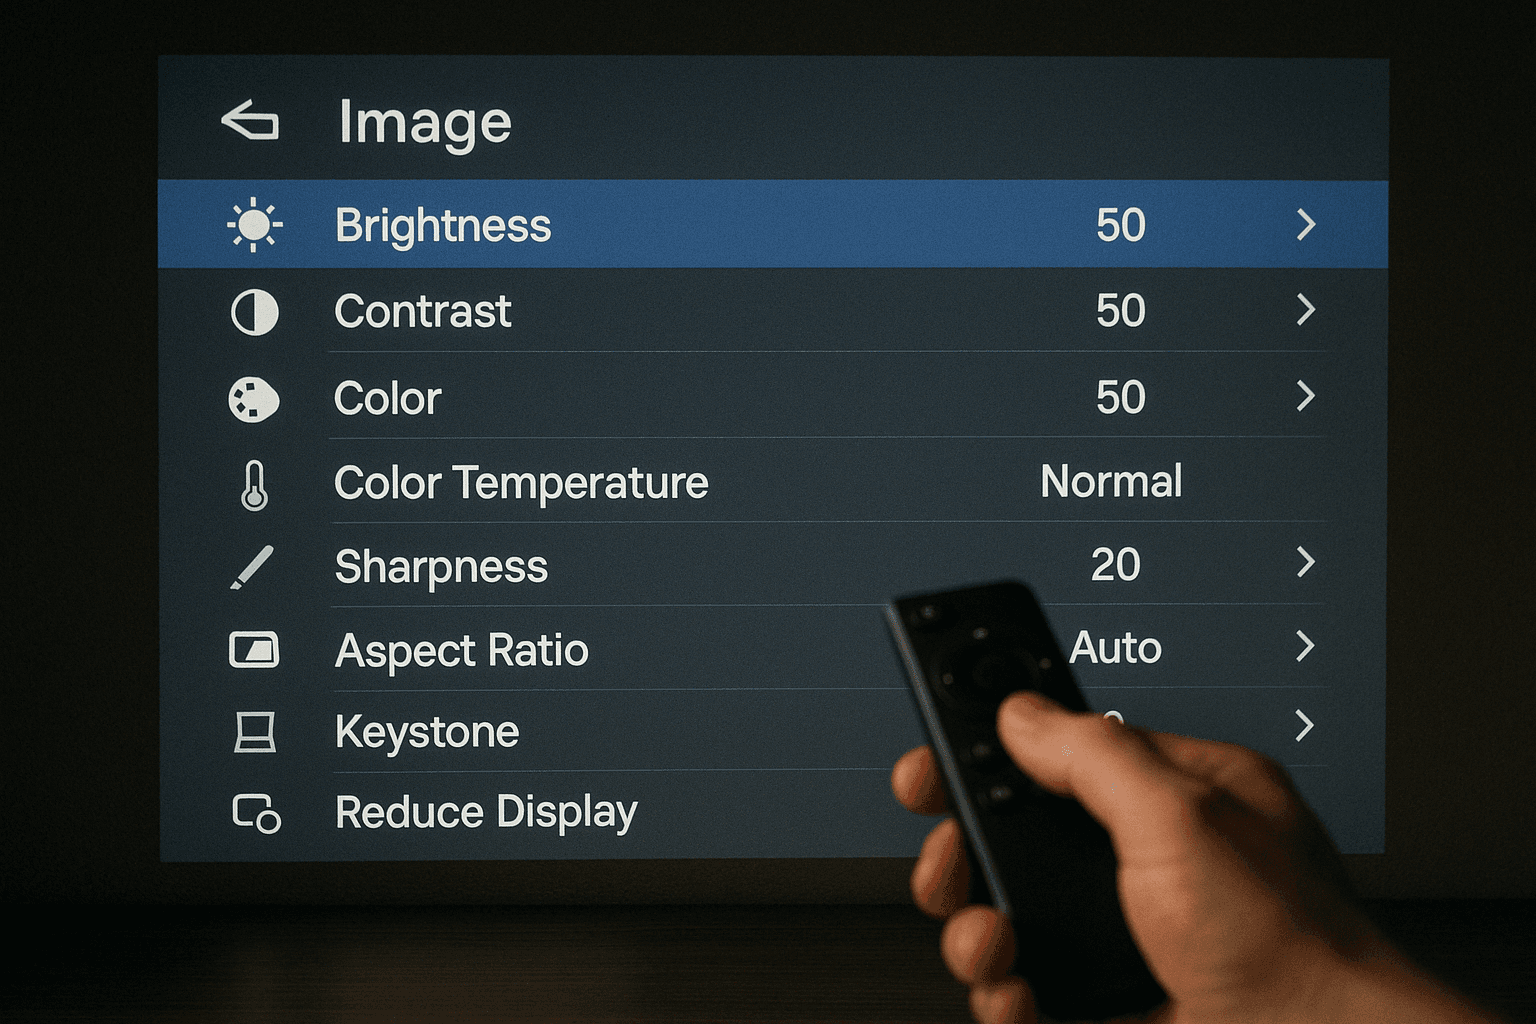
1. Brightness & Contrast
- Brightness: Start at 50% and adjust so black areas look truly black, not gray
- Contrast: Start at 50% and increase until white areas look bright without losing detail
- Avoid maxing out either setting—this crushes detail in dark or bright areas
2. Color Settings
- Color Temperature: "Warm" for movies (more reddish), "Cool" for presentations (more bluish), "Standard/Normal" for general use
- Color Saturation: Start at 45-50% to avoid the "cartoon look" of oversaturated colors
- Tint/Hue: Should typically remain at 0 or center position
3. Picture Modes
- Movie/Cinema Mode: Best for films (warmer colors, better contrast)
- Standard Mode: Good all-around choice
- Vivid/Dynamic Mode: Often too bright and oversaturated (avoid unless in very bright rooms)
- Game Mode: Reduces processing for faster response times (use for gaming)
4. Advanced Settings
- Noise Reduction: Set to Low or Off for HD content, Medium for lower quality sources
- Sharpness: Between 25-40% is usually best (too high creates artificial edges)
- Gamma: 2.2 is standard for most content (higher for darker rooms)
- Keystone Correction: Use minimally or not at all (reduces image quality)
Avoid These Common Settings Mistakes
- Using the "Vivid" or "Dynamic" preset (creates an unnatural, oversaturated look)
- Maxing out sharpness (creates artificial edges and halos around objects)
- Heavy keystone correction (significantly reduces actual resolution)
- Using the wrong aspect ratio for your content (creates stretching or letterboxing)
Source Material & Connection Quality
All the optimization in the world can't fix poor-quality source material. Here's how to ensure you're feeding your projector the best possible content:
Content Resolution Matters
- Match content to your projector's native resolution when possible
- For 720p projectors, HD (720p) content looks best
- For 1080p projectors, Full HD (1080p) content is ideal
- Streaming quality settings should be set to "High" or "Best"
- Properly encoded Blu-ray rips or official streaming apps provide best quality
Connection Quality Tips
- Use HDMI whenever possible (highest quality connection)
- Ensure HDMI cables are working properly (test with another device)
- For wireless connections, ensure proper setup and strong WiFi signal
- Disable any unnecessary video processing on your source device
- For streaming, ensure sufficient internet bandwidth (25+ Mbps for 4K)

Audio Considerations (Yes, They Affect Perceived Quality!)
While not strictly an "image quality" tip, the audio experience significantly affects how we perceive visual quality. Don't underestimate the impact of good sound!
Most mini projectors have built-in speakers that are adequate but not impressive. For a truly immersive experience:
- Connect external speakers or a soundbar via 3.5mm audio output or Bluetooth (if available)
- Position speakers properly for best stereo separation
- If using the built-in speaker, place the projector where sound can reflect well
- Consider a projector with better built-in audio like the VOPLLS 4K if audio is important to you
Bringing It All Together: A Complete Setup Checklist
Your Mini Projector Optimization Checklist
Preparation:
- Darken room as much as possible (blackout curtains, turn off lights)
- Clean projection surface (screen, wall, etc.)
- Ensure projector lens is clean (use proper lens cleaning method)
- Position screen flat and wrinkle-free
Setup:
- Position projector perpendicular to screen at manufacturer's recommended distance
- Align projector height with center of screen when possible
- Connect best quality source device using HDMI
- Connect external speakers if available
Adjustment:
- Select appropriate aspect ratio (usually 16:9)
- Choose appropriate picture mode (Movie/Cinema for films)
- Focus carefully using text
- Minimize keystone correction
- Fine-tune brightness, contrast, color temperature
- Set sharpness to moderate level (25-40%)
Final Checks:
- Check that black levels look truly black (not gray)
- Verify white areas have detail (not blown out)
- Confirm colors look natural (not oversaturated)
- Ensure text is sharp and readable
- Eliminate any visible keystone distortion
Remember This Above All
Even a budget mini projector can produce a surprisingly good image when properly set up. Be patient with the process—finding the right settings and environment for your specific model and room is key to unlocking your projector's full potential.
Reality Check: When to Consider an Upgrade
While these optimization tips can dramatically improve your projector's performance, they can't overcome fundamental hardware limitations. If you've tried everything and still aren't satisfied, it might be time to consider an upgrade.
Signs your current projector might be due for an upgrade:
- Brightness is insufficient even in completely dark rooms
- Resolution is too low for your typical viewing distance and screen size
- Colors appear washed out despite proper calibration
- Contrast ratio is poor (blacks appear gray, whites lack punch)
- Focus is inconsistent across the screen
If you're ready to upgrade, check out our Top Mini Projectors for Home Entertainment in 2025 for current recommendations.
Your Turn: Share Your Experiences
Have you tried any of these image quality tips with your mini projector? Do you have any additional tricks that worked well for your specific setup? We'd love to hear about your experiences and any creative solutions you've discovered.
Remember, the perfect setup is the one that works best for your specific needs and environment. Happy projecting!
Stay Updated
Get the latest projector reviews and deals in your inbox.
We respect your privacy.